If you need to split your audience into several rooms during your event (brainstorming session, networking, online courses...), it is possible to do so with our breakout room feature. Indeed, once your event is started, several groups can be dispatched to different rooms and join again in the main room whenever they feel like it or when you decide to. 🙌
Breakout rooms are available for customers under monthly active contact plans.
Breakout rooms aren't compatible with on-demand events.

In this article, we'll see what the breakout rooms' specifications are and we'll teach you how to create them depending on the three different assignment methods (manual, automatic, and autonomous).
It is not currently possible to obtain analytical data on the breakout rooms in the dashboard. However, please note that the attendance rate is calculated according to the main room and the breakout rooms.
In this article
- Breakout Rooms' Specifications
- Create Your Breakout Rooms & Name Them
- Choose the Breakout Room Assignment Method
- Manually Assign Attendees to the Breakout Rooms
- Automatically Assign Attendees to the Breakout rooms
- Autonomously Assign Attendees to the Breakout Rooms
- Reassign Attendees During the Breakout Room Session
- Switch Breakout Rooms During a Session
- End Your Breakout Rooms
Breakout Rooms' Specifications
- You must start the event to access the breakout room feature.
- Only team members can set up breakout rooms.
- The breakout rooms won't be recorded even if your event is recorded. It will only record the main room.
- You can create as many breakout rooms as you need.
- Everyone can participate by default in the breakout rooms (up to 25 simultaneous speakers).
Even if you have selected 'Only team members and guest speakers can speak' in the speaking permissions of your event settings, all attendees will be able to speak in the breakout rooms for up to 25 simultaneous speakers. Once the room is full with 25 speakers, one will have to be removed to let a new one participate.
- The speakers in the main room will be able to speak directly in the breakout room as they join (up to 25 simultaneous speakers). Their settings will be the same as the ones in the main room (audio, video, virtual background).
- Attendees of the main room will need to click on the Participate button at the bottom of the room. A window will open, allowing them to choose their settings (audio, video, virtual background). They will also be able to Join as viewer. When going back to the main room, they will go back as viewers.
Create Your Breakout Rooms & Name Them
Once your event is started, you can start creating your breakout rooms.
Your breakout rooms will have the same custom design as your main room.
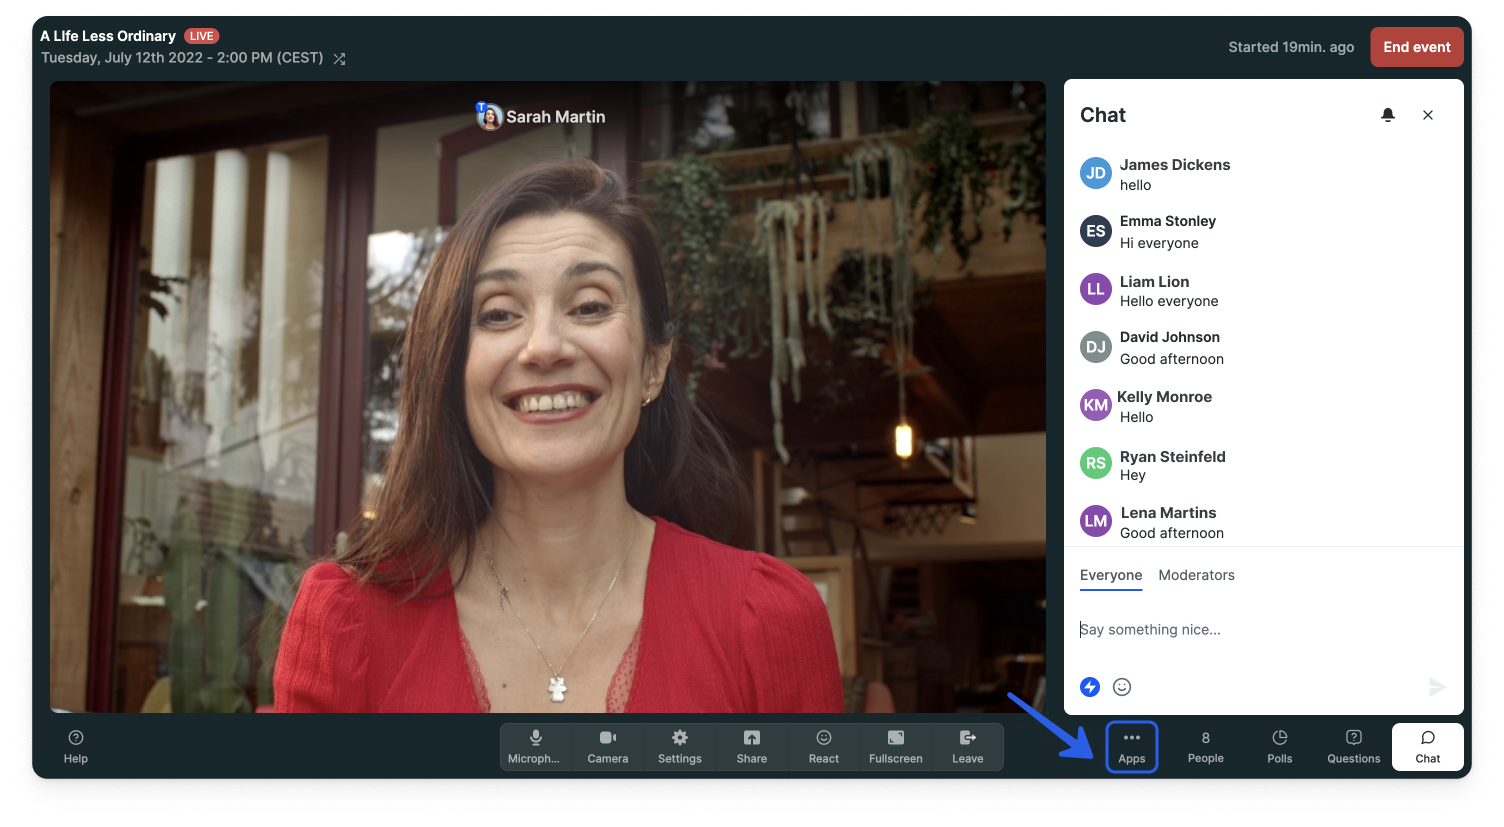
- 1
- Click on the Apps icon at the bottom of the room.
-
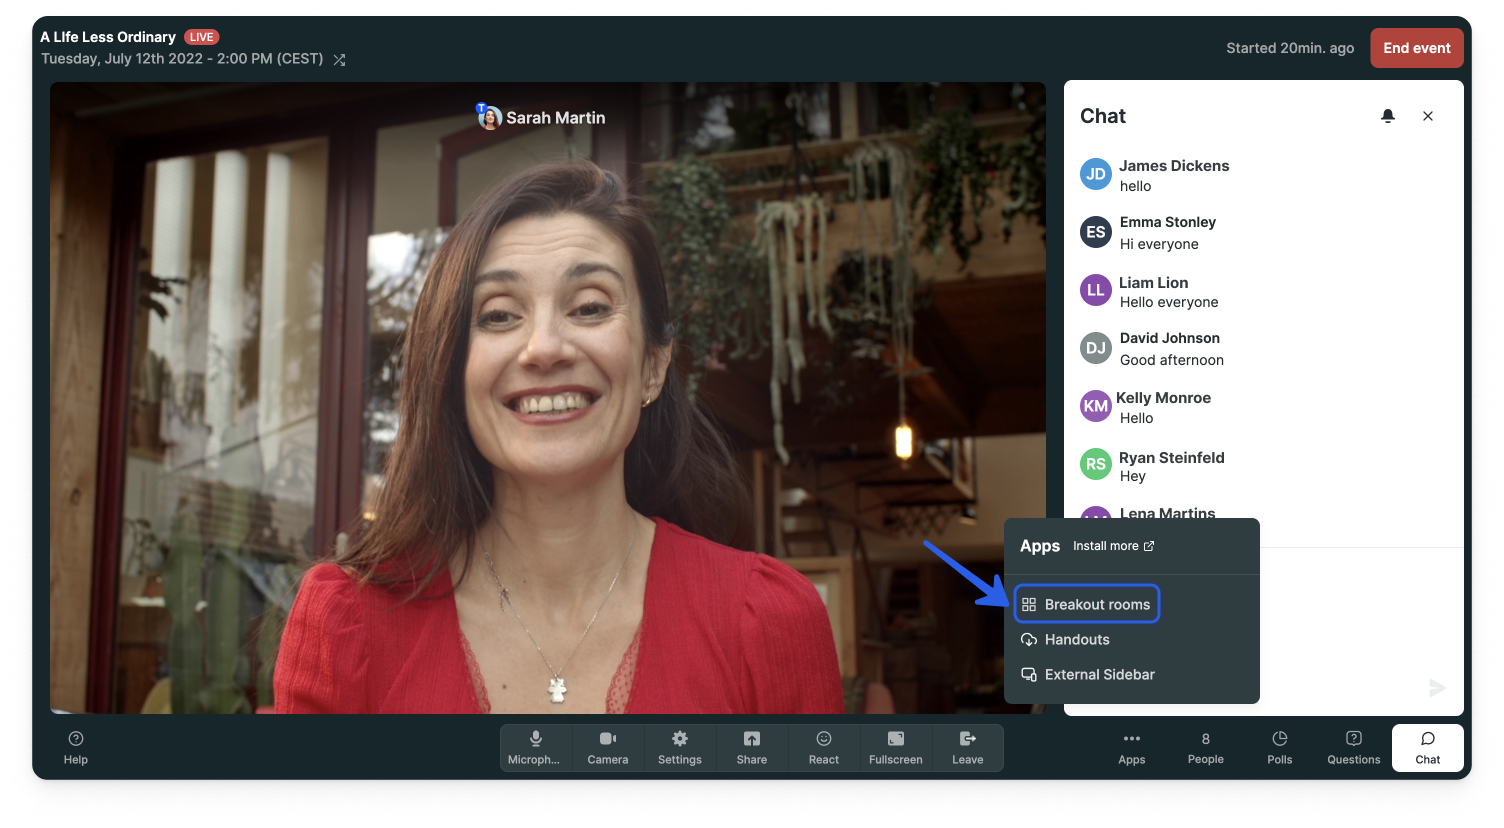
- 2
- Select the Breakout rooms app.
-
- 3
- You can add rooms or rename them by clicking inside the name field.
-
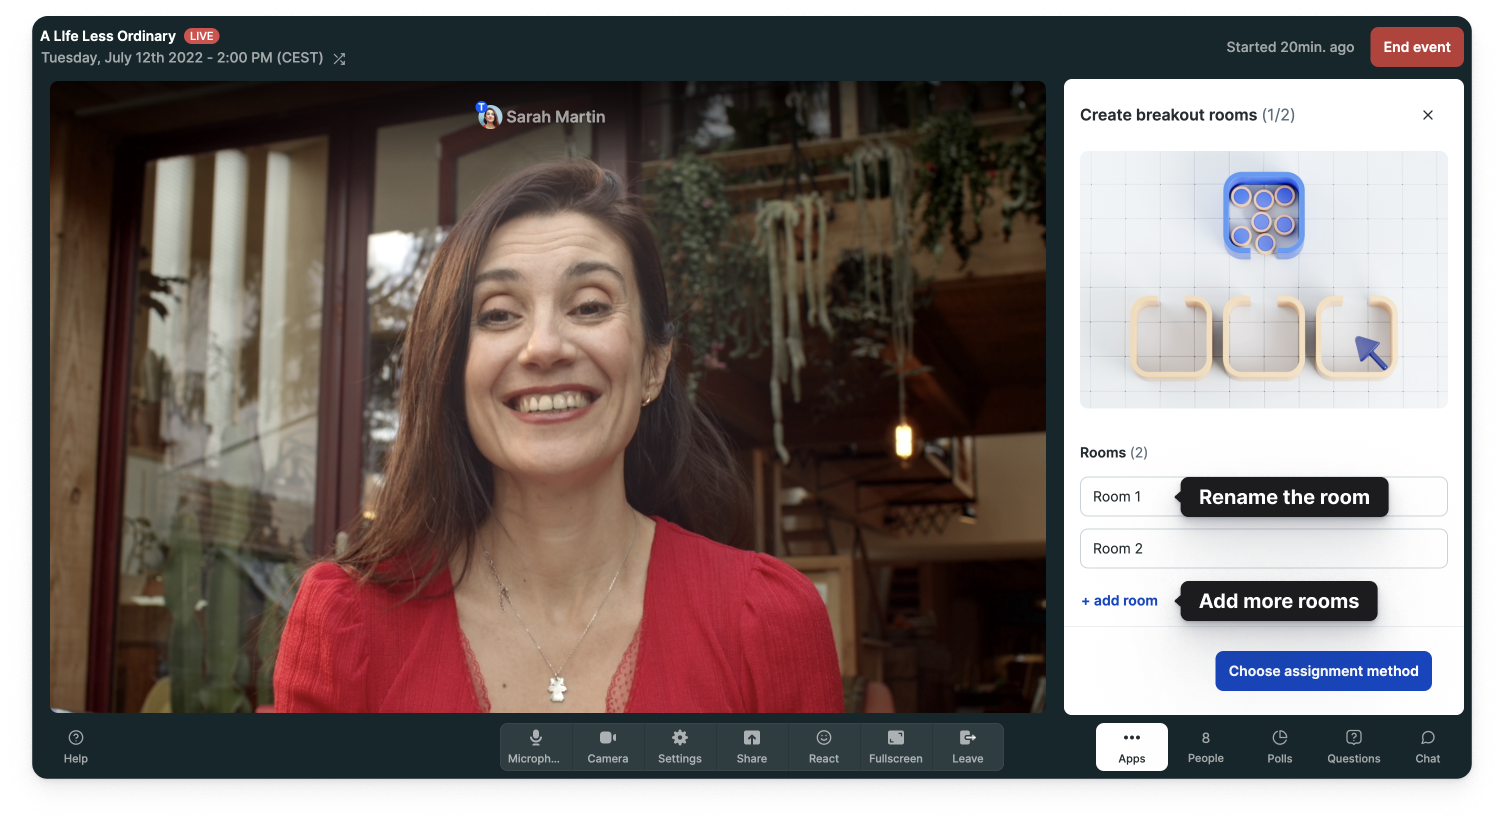
- 4
- You can always delete a room by clicking on the - sign at the right of the field.
-

- 5
- You're now ready to click on Choose assignment method to go to the next step.
-

Livestorm Tip 👉 You can prepare your breakout rooms in advance before starting the breakout room session. Your settings will remain the same (number of rooms, names, assignment method, additional options) if you close the window in the sidebar but not if you leave the event. 😉
Choose the Breakout Rooms Assignment Method
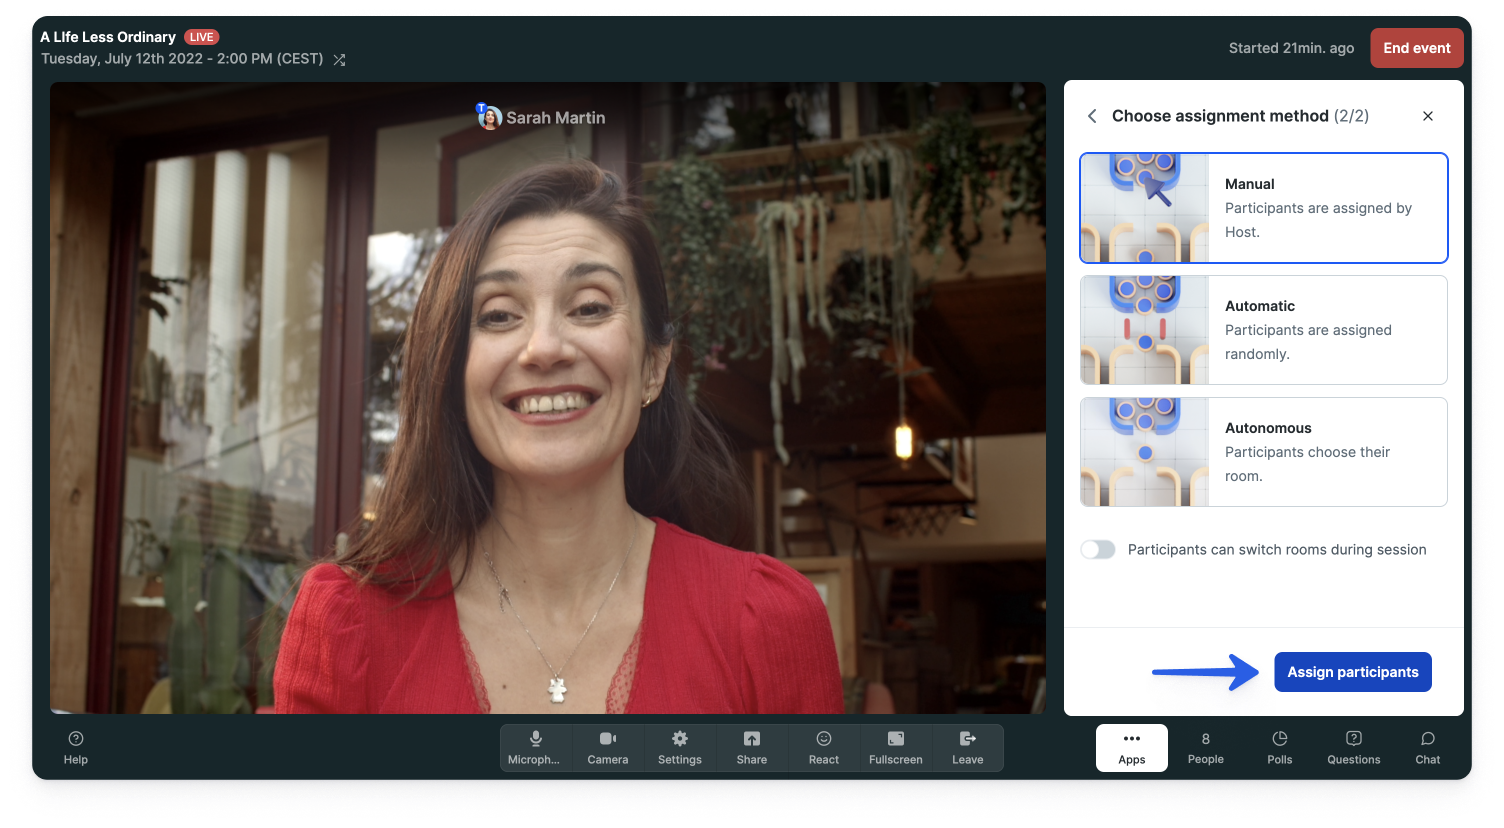
After creating the necessary number of breakout rooms and choosing their name, you will have the possibility to assign your attendees with three different methods depending on your needs. Indeed, you can:
- Manually Assign Attendees to the Breakout Rooms: you will be assigning each attendee to a specific breakout room.
- Automatically Assign Attendees to the Breakout Rooms: attendees will be assigned randomly and evenly among the breakout rooms.
- Autonomously Assign Attendees to the Breakout Rooms: attendees will be able to choose themselves their breakout rooms.
Manually Assign Attendees to the Breakout Rooms
With this assignment method, you will be dispatching each attendee to a specific breakout room.
- 1
- Select the Manual assignment method.
-

- 2
- You can choose if your attendees will be able to switch rooms during the session.
- Team members can always switch rooms.
-

- 3
- Click on Assign participants to start the dispatching.
-
- 4
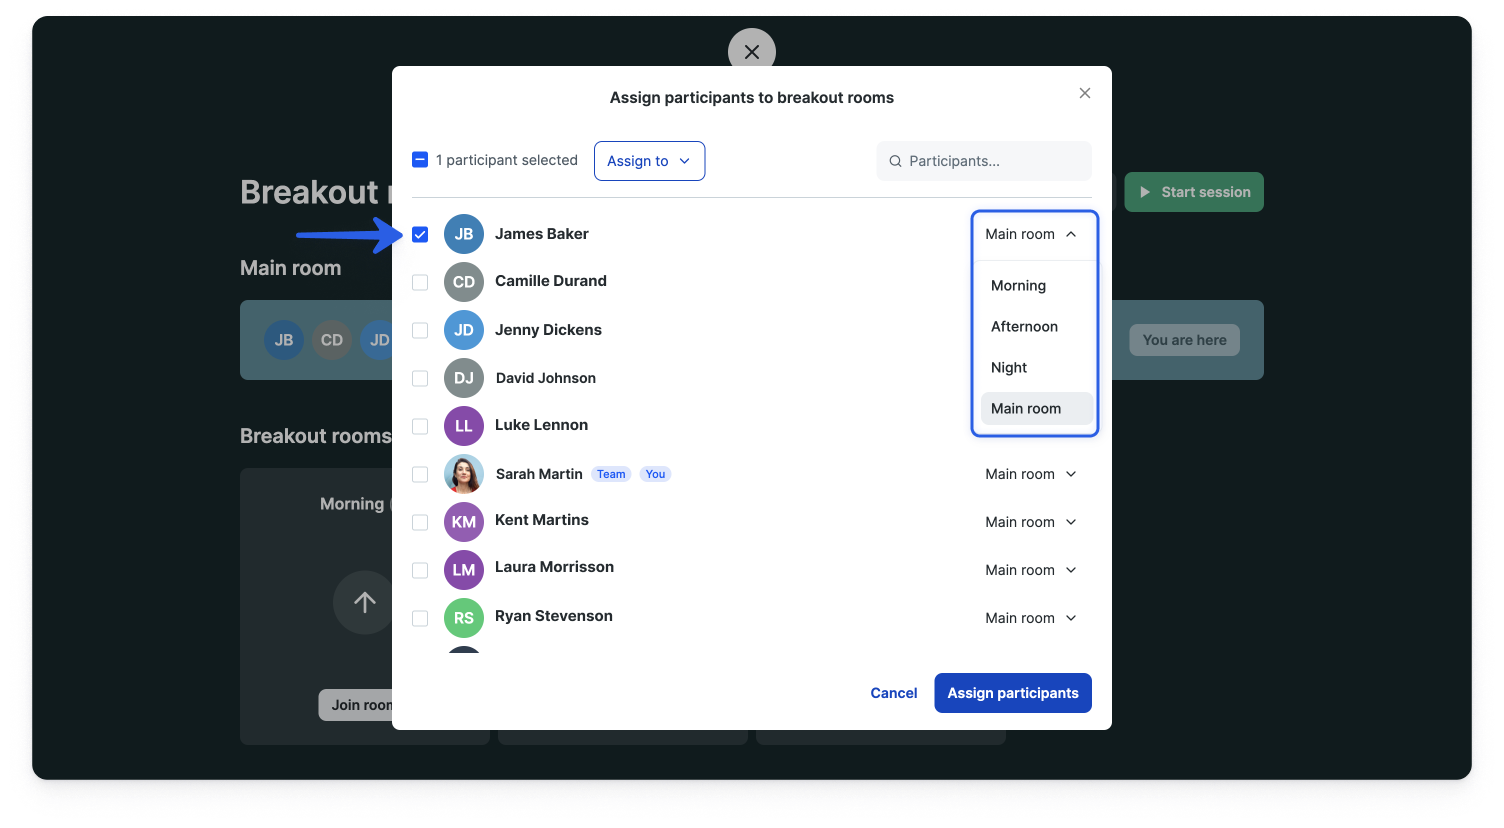
- You can assign attendees one by one by ticking the box next to their name and selecting a breakout room from the drop-down menu.
-

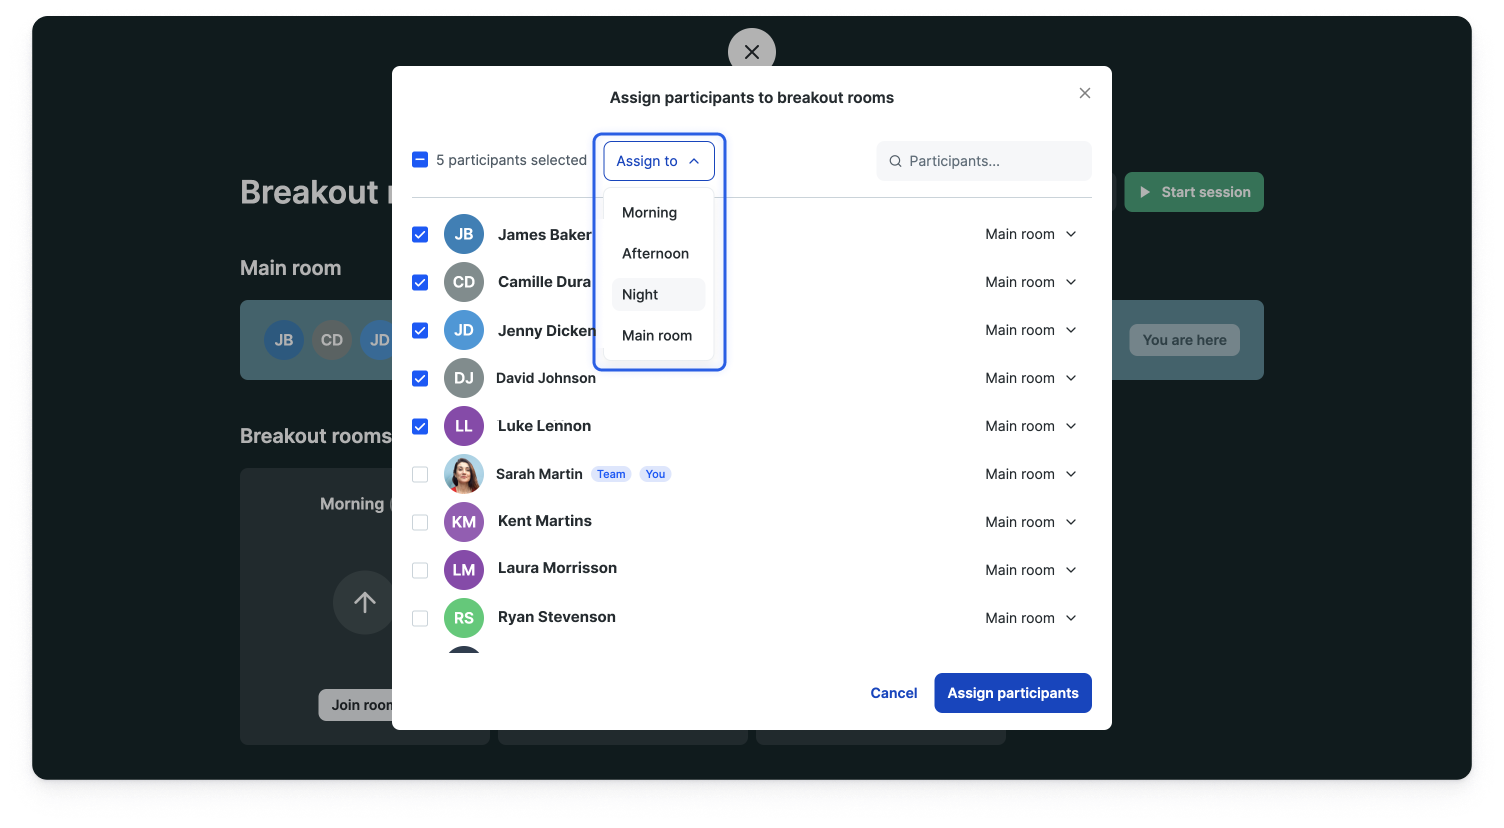
- 5
- If you have a lot of attendees to dispatch, you can select them one by one by ticking the box next to their names and then assigning them in bulk to a specific breakout room with the drop-down menu at the top.
-
- 6
- Looking for a specific attendee? You can use the research field instead of scrolling down your list.
-

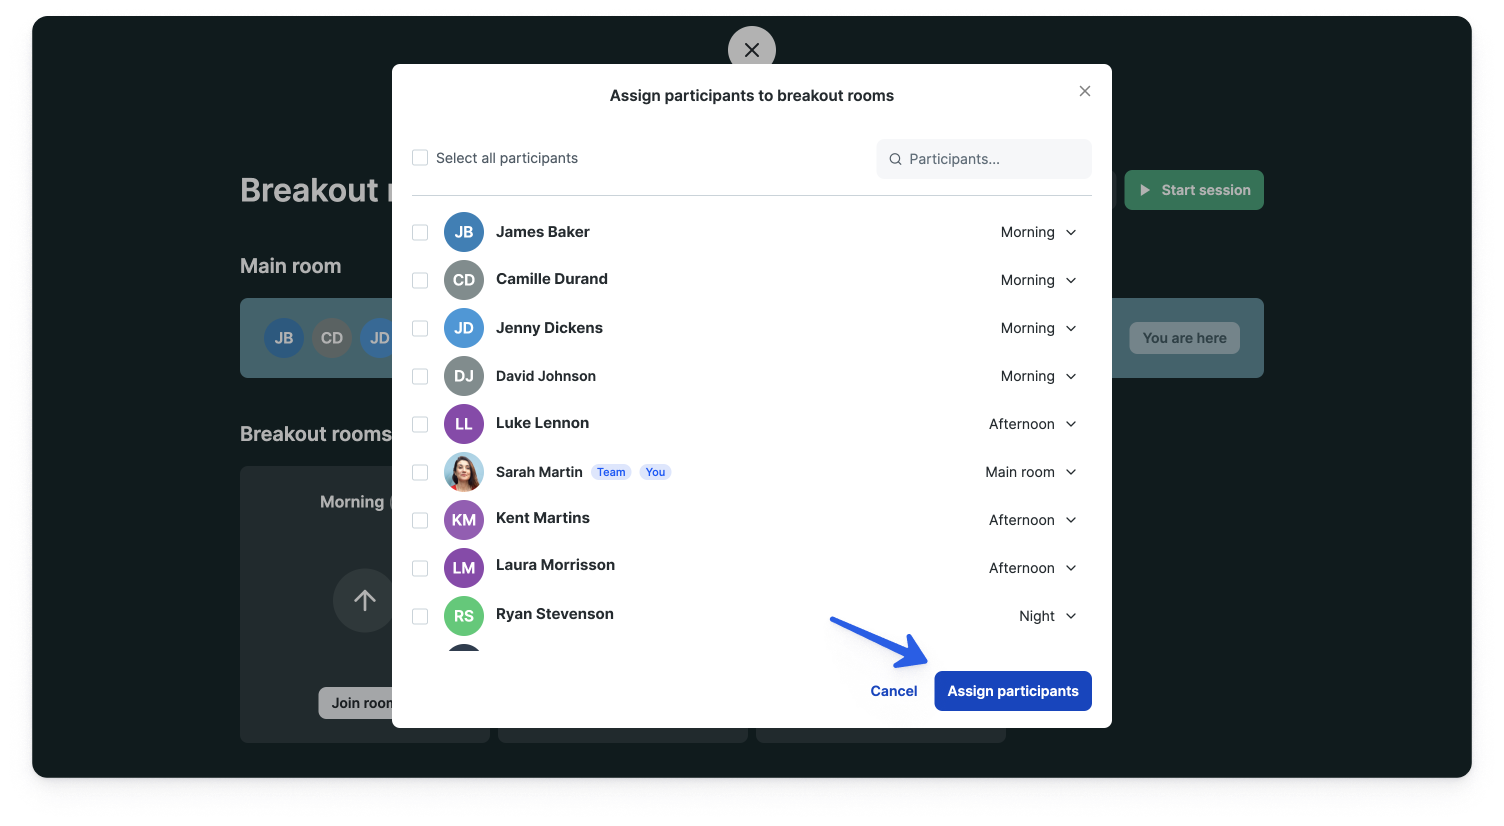
- 7
- Once you're done with the assignment, click on Assign participants.
-
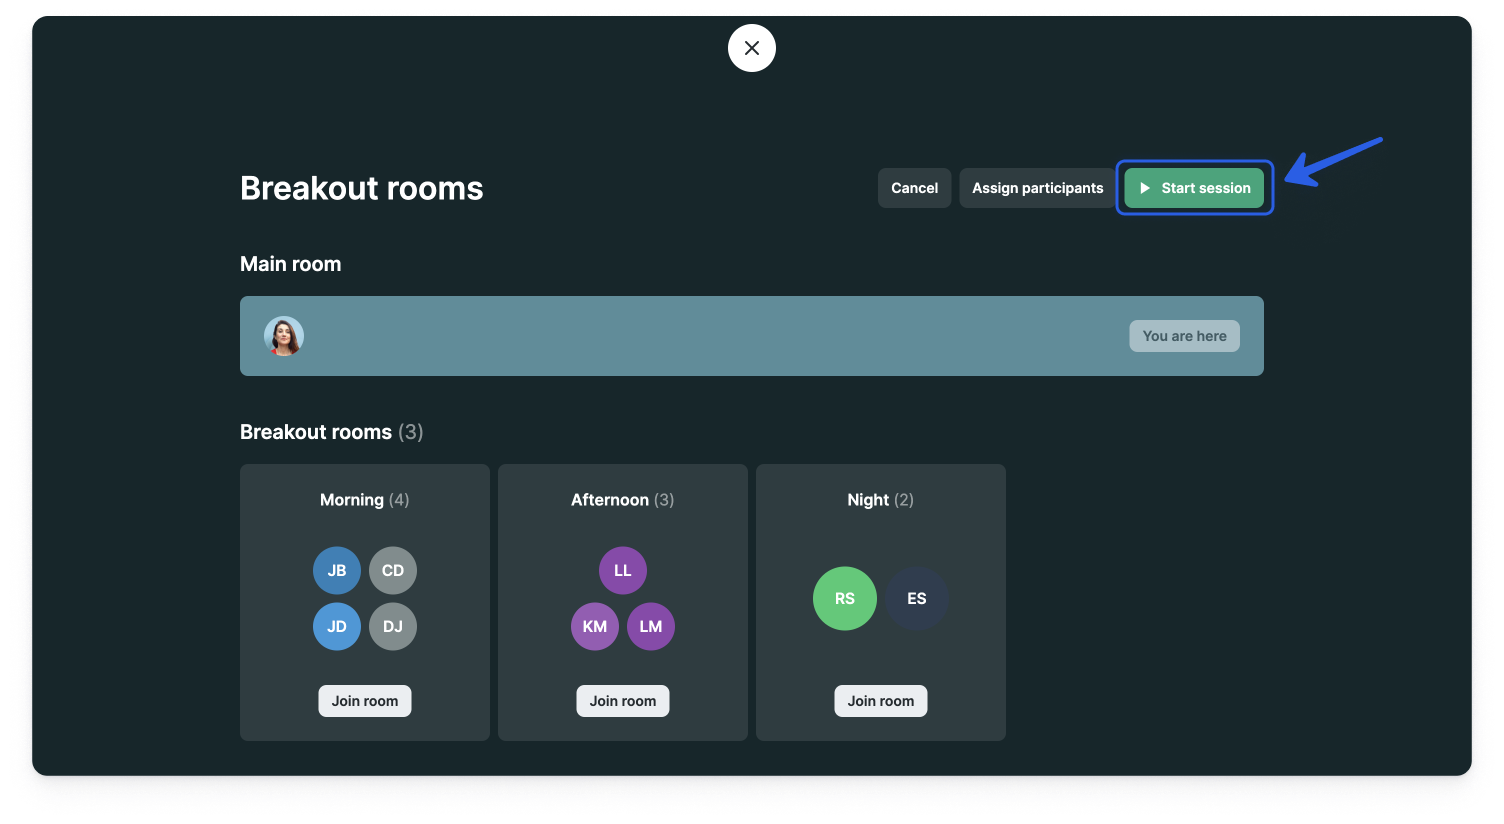
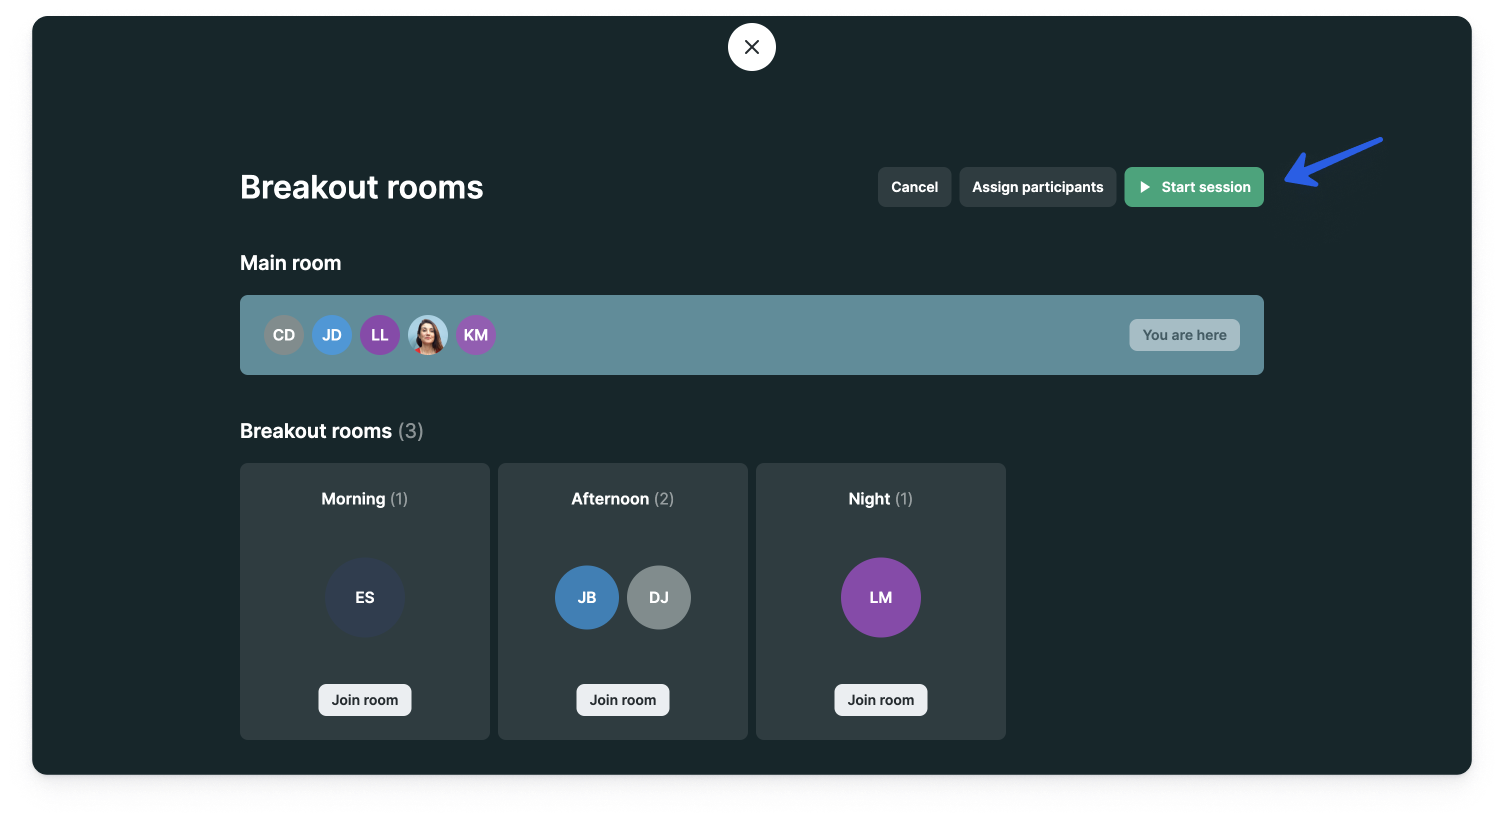
- 8
- You will then be directed to the breakout room hub where you will be able to click on Start session.
- It won't be possible to create any more breakout rooms or rename them after the session has started.
-
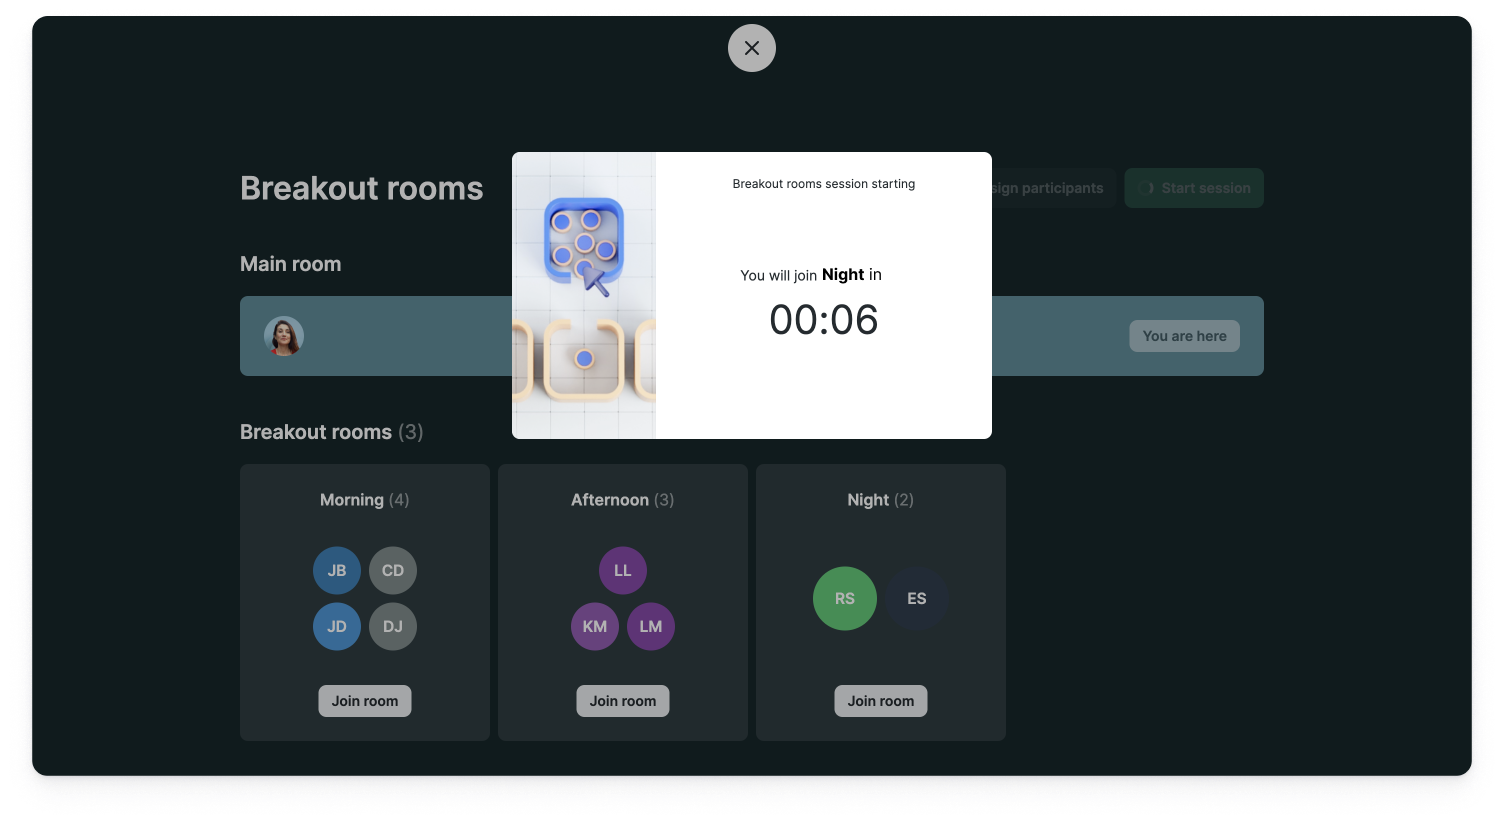
- 9
- There will be a 10-second countdown before the dispatch.
-
- 10
- That's it! Your attendees have all joined their assigned breakout rooms. 🎉
-

If some attendees arrive after you've started the breakout room session with manual assignment, they will join the main room and you will be able to assign them manually to their breakout room.
Automatically Assign Attendees to the Breakout Rooms
With this assignment method, your attendees will be dispatched randomly and evenly among the breakout rooms.
- 1
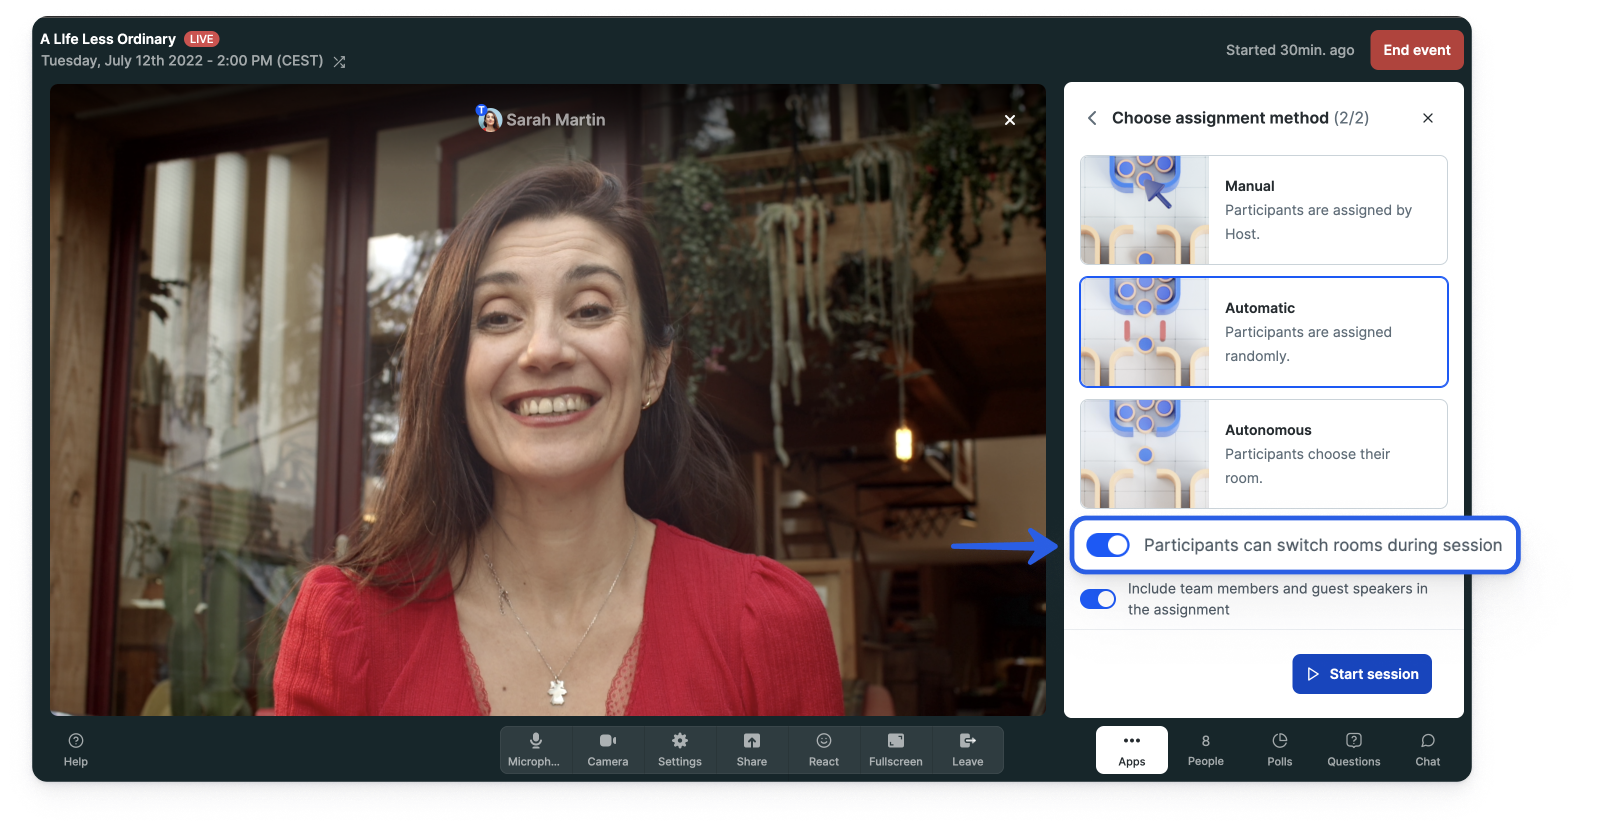
- Select the Automatic assignment method.
-
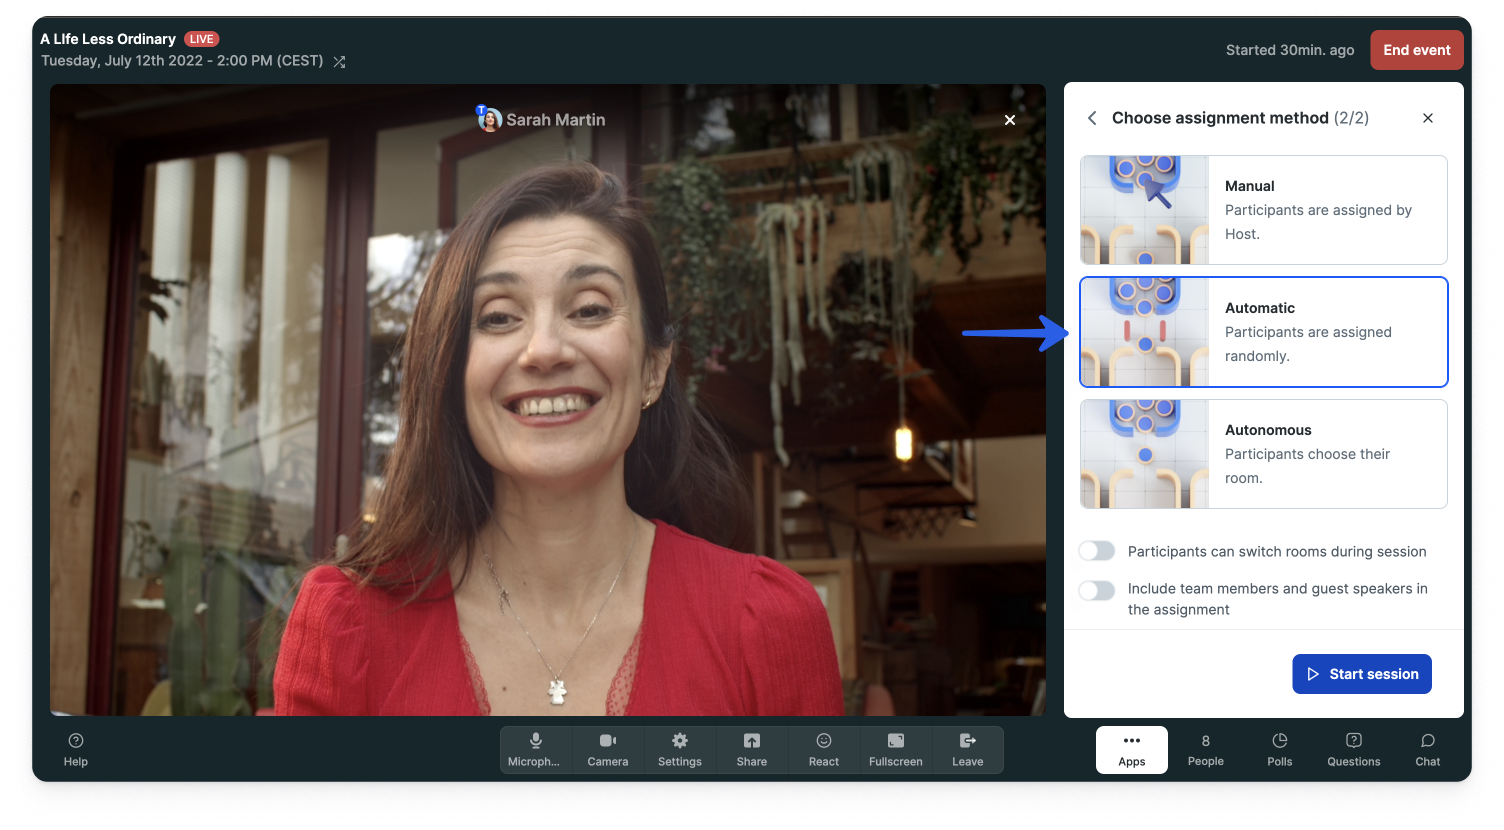
- 2
- You can choose if your attendees will be able to switch rooms during the session and if you want to include team members and guest speakers in the assignment.
- Team members can always switch rooms.
-

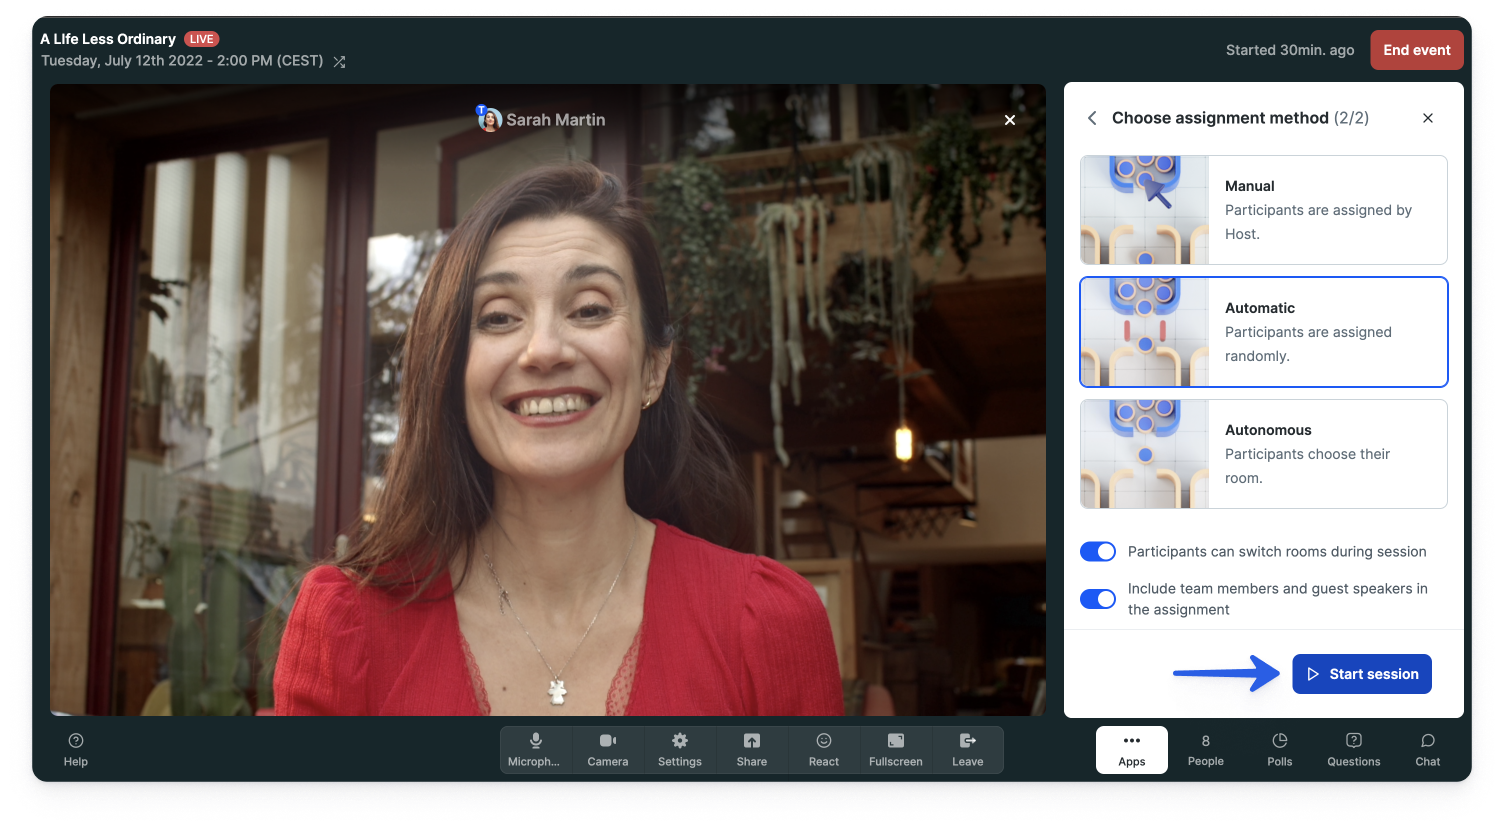
- 3
- Click on Start session.
- It won't be possible to create any more breakout rooms or rename them after the session has started.
-
- 4
- A 10-second countdown will start before the automatic dispatch.
-
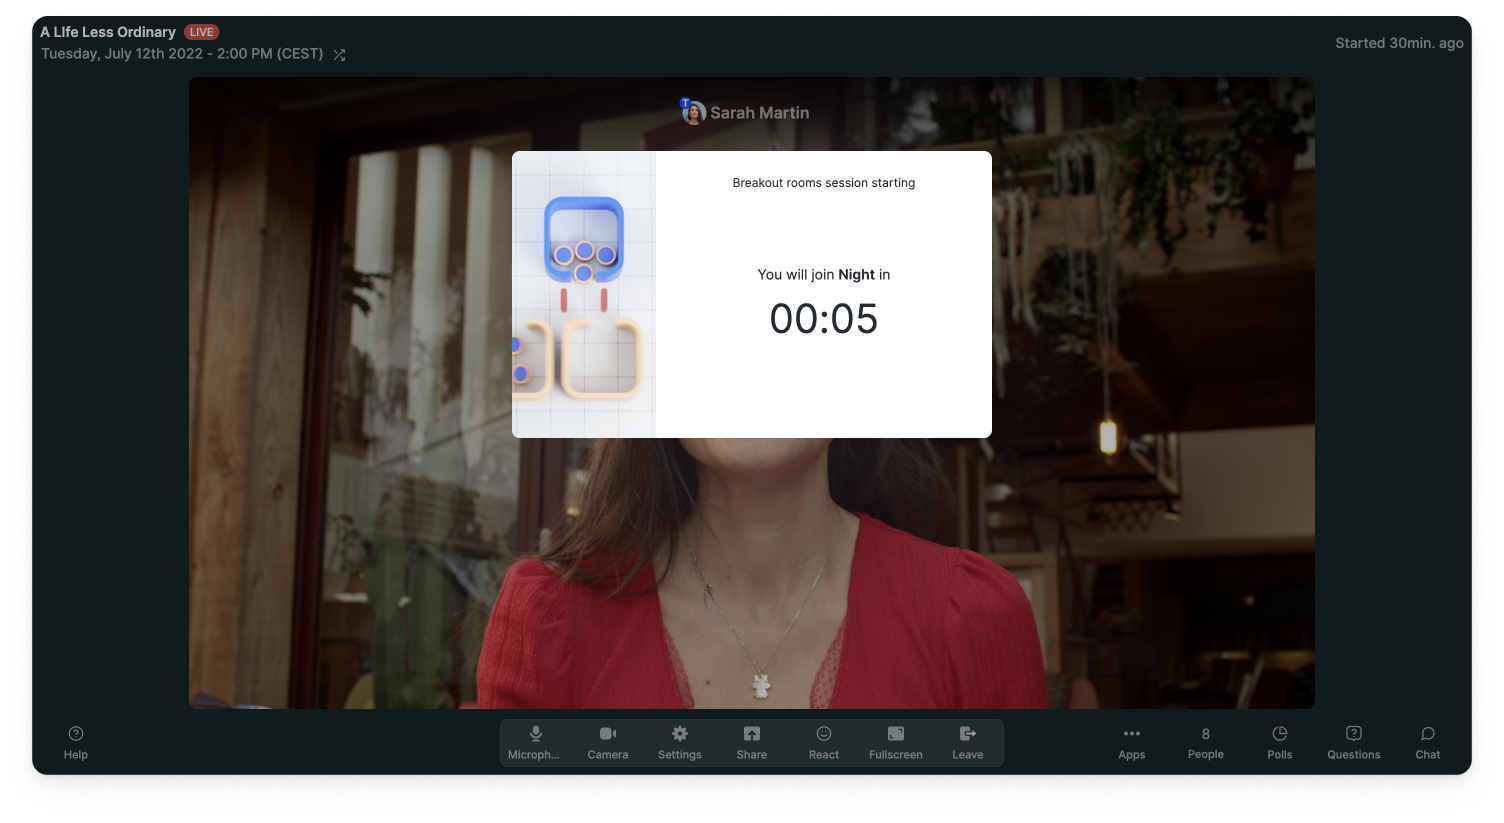
- 5
- That's it! Your attendees have been automatically assigned to the breakout rooms. 🎉
-

If some attendees arrive after you've started the breakout room session with automatic assignment, they will join the main room and will then automatically be randomly assigned to the breakout rooms.
Autonomously Assign Attendees to the Breakout Rooms
With this assignment method, your attendees will be able to join in the breakout rooms of their choice.
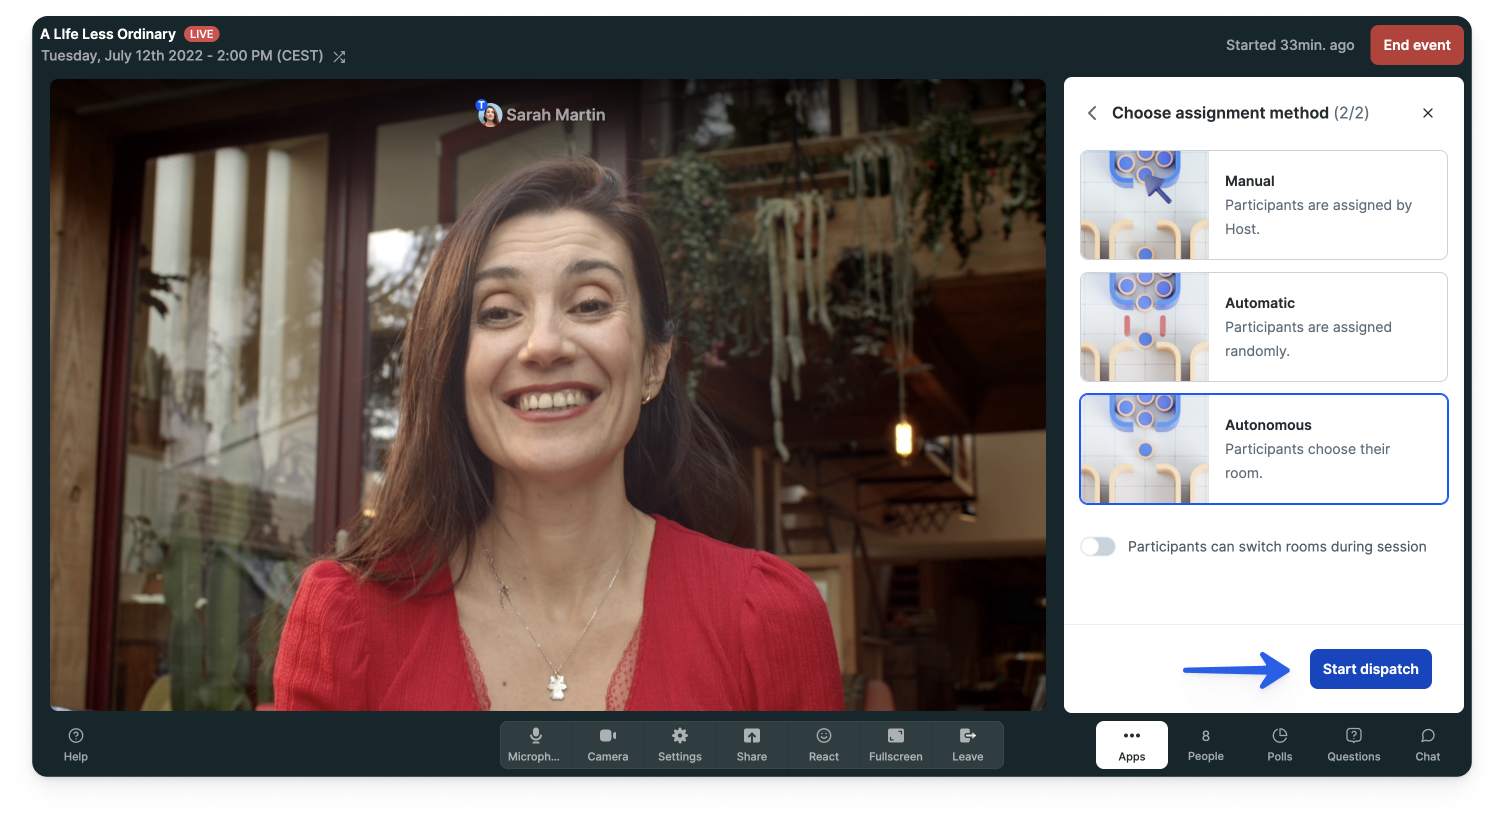
- 1
- Select the Autonomous assignment method.
-

- 2
- You can choose if your attendees will be able to switch rooms during the session.
- Team members can always switch rooms.
-

- 3
- Click on Start dispatch.
-
- 4
- In the breakout room hub, your attendees will be able to Join the room of their choice.
-
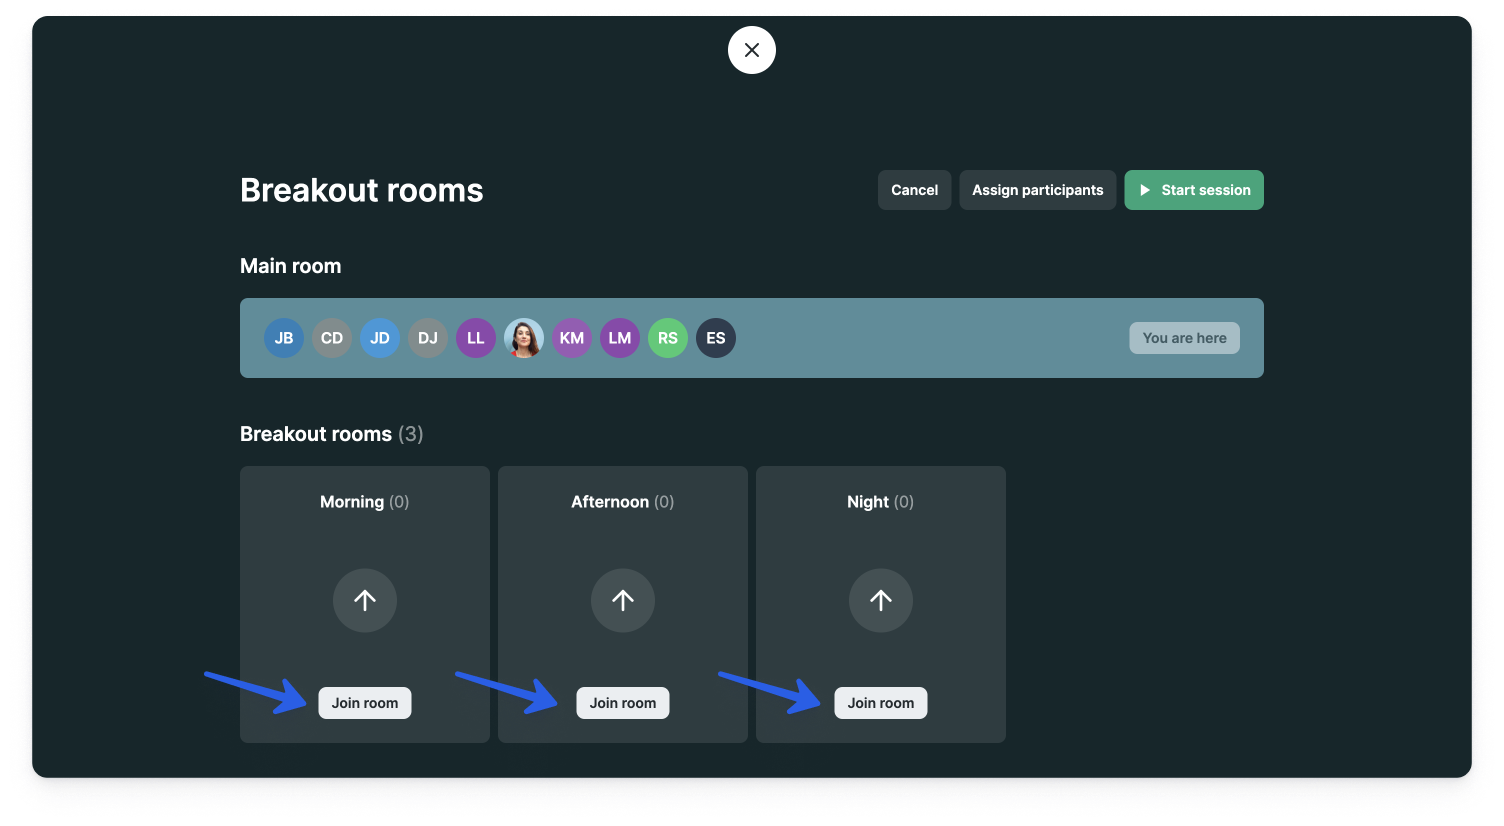
- 5
- Click on Start session.
- It won't be possible to create any more breakout rooms or rename them after the session has started.
-
- 6
-
There will be a 10-second countdown before the attendees will be directed to their chosen breakout room.
-

- 7
- That's it! Your attendees have joined their rooms. 🎉
-

If some attendees arrive after you've started the breakout room session with autonomous assignment, they will join the breakout room hub and be able to join the room of their choice.
Reassign Attendees During the Breakout Room Session
Team Members can always manually reassign attendees to a different breakout room during the session.
- 1
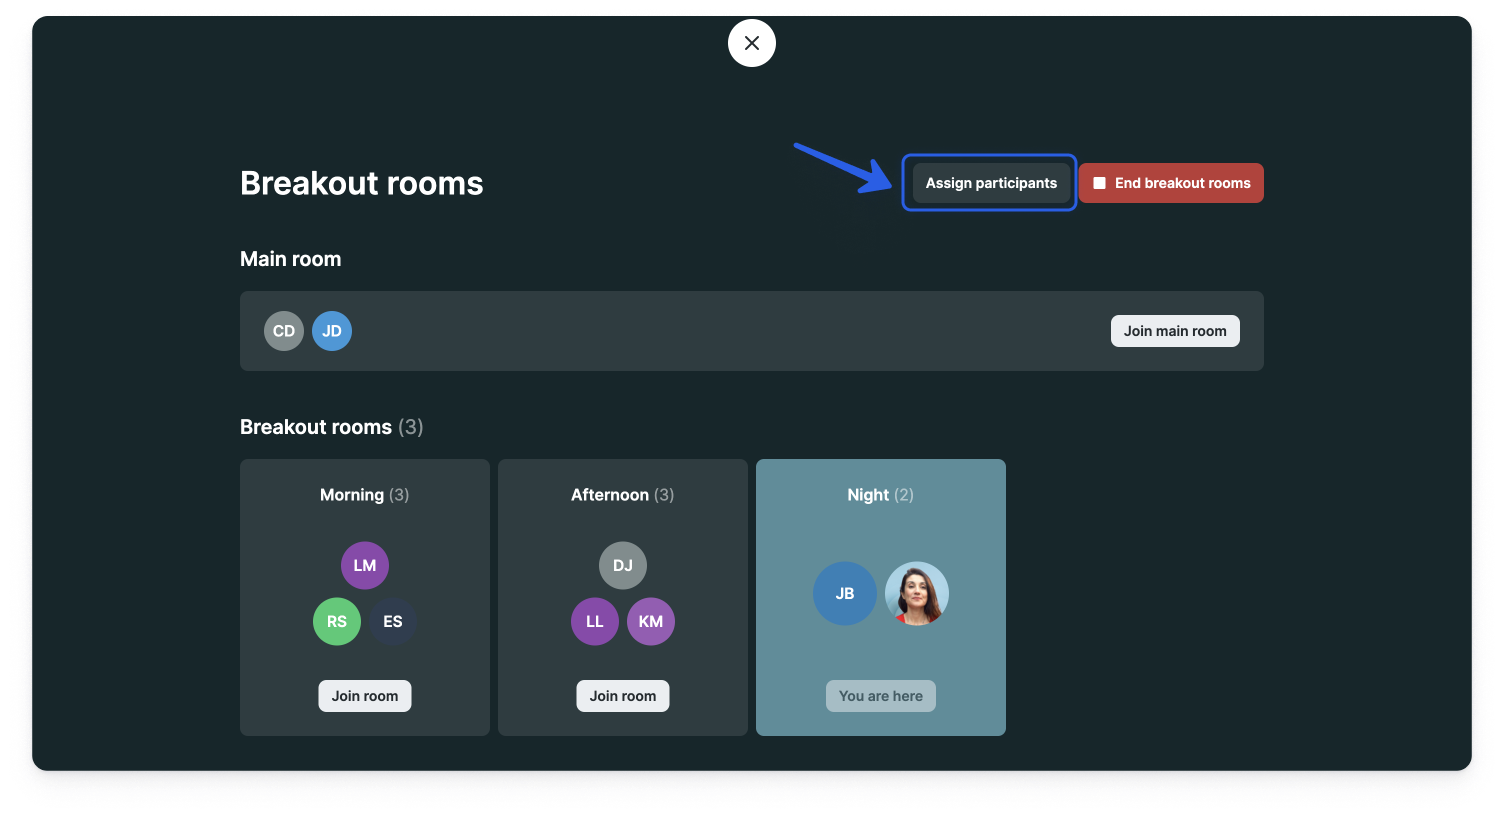
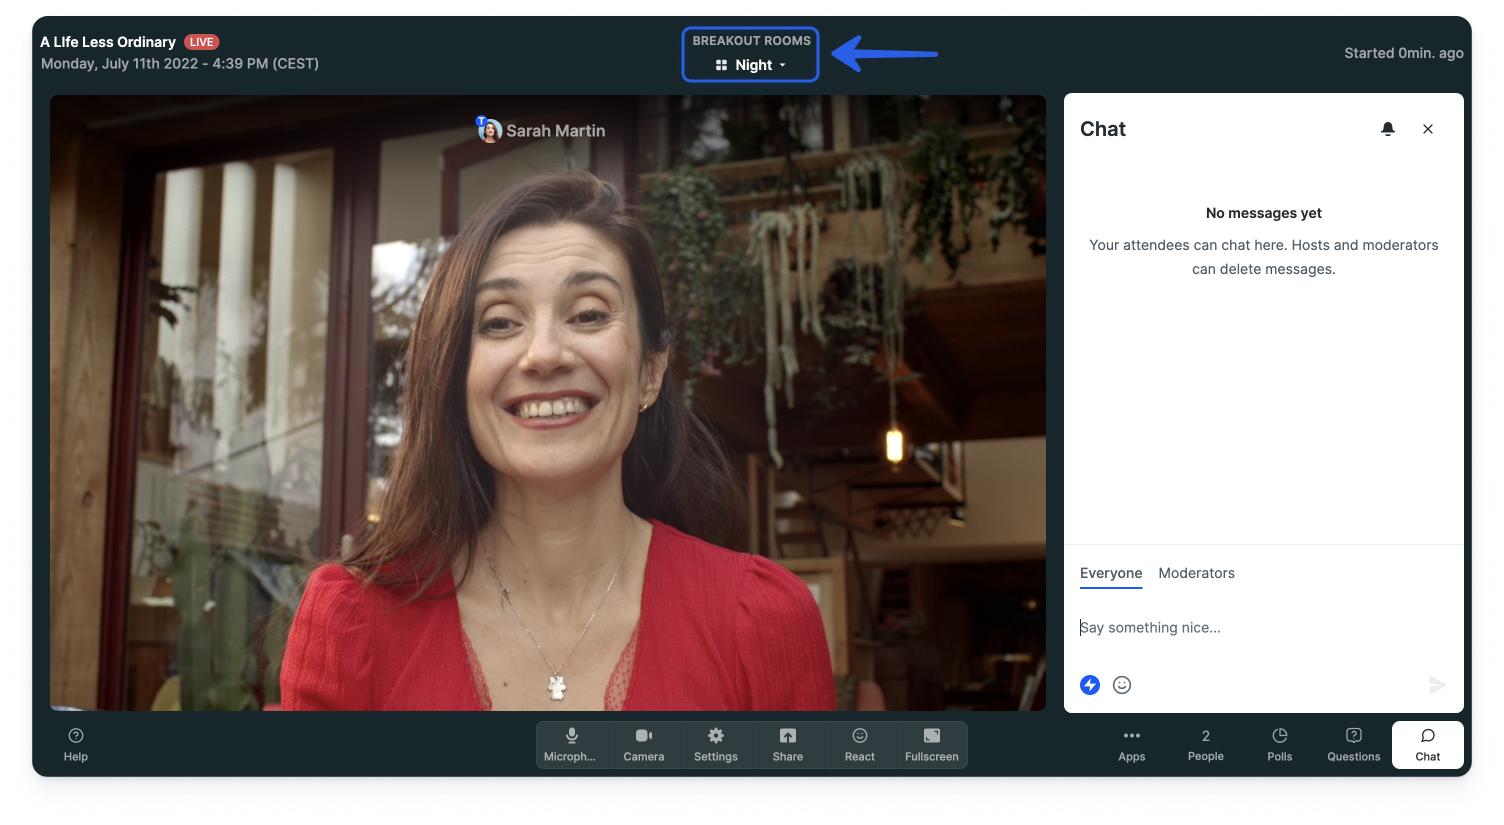
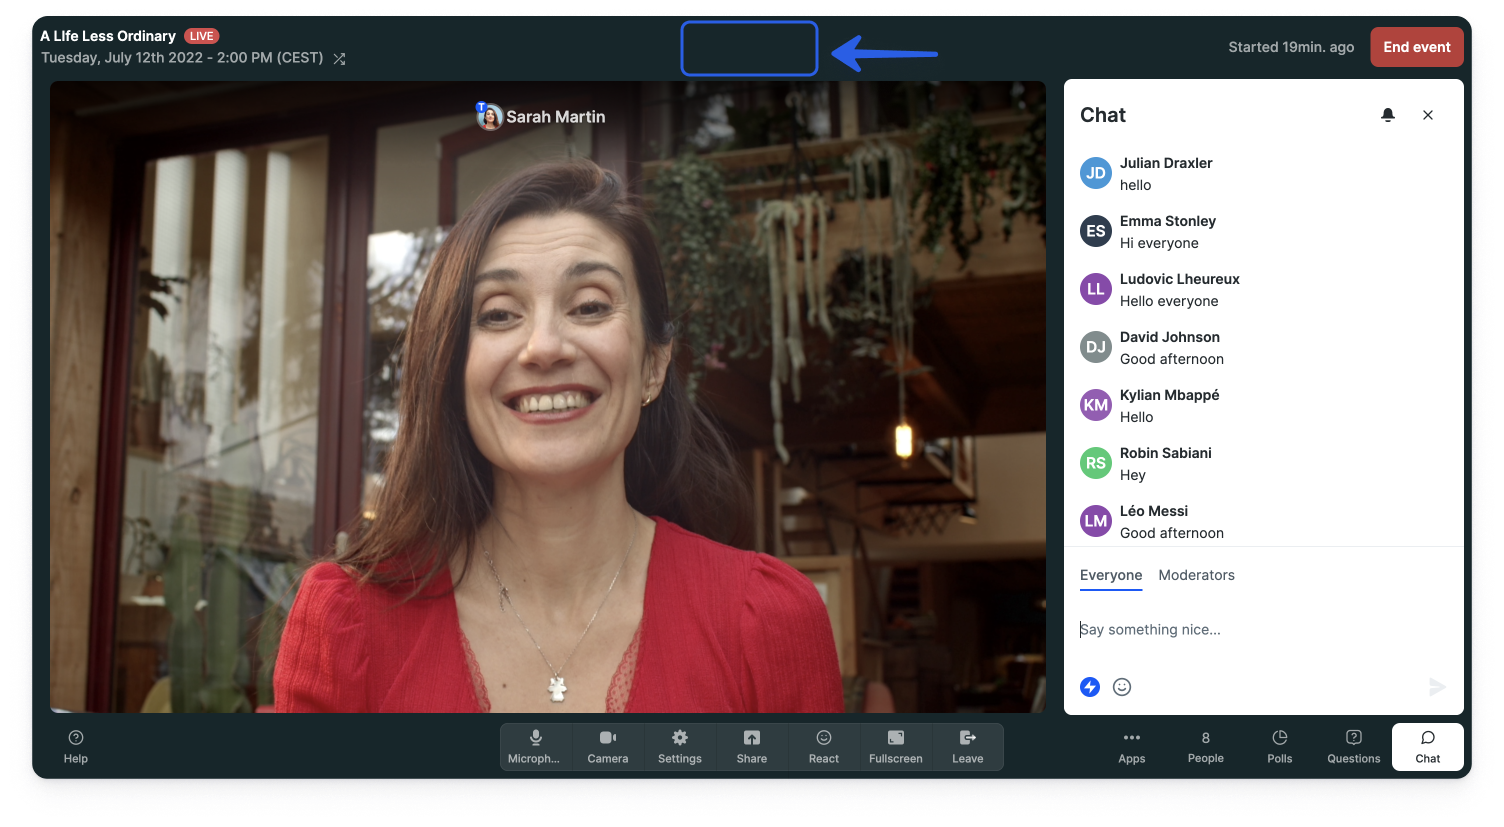
- Click on the name of your room at the middle top of the room to go back to the breakout room hub.
-

- 2
- Click on Assign participants.
-
- 3
- Reassign your attendees by ticking the box next to their names and selecting their new breakout room in the drop-down menu.
-
- 4
- Click on Assign participants to validate your choice.
-

Switch Breakout Rooms During a Session
If you've selected 'Participants can switch rooms during session' when choosing the assignment method, they will be able to change rooms as they please.
Team members can always switch rooms.
- 1
- Click on the name of your room at the middle top of the room to go to the breakout room hub.
-

- 2
- Switch rooms by clicking on Join room.
-
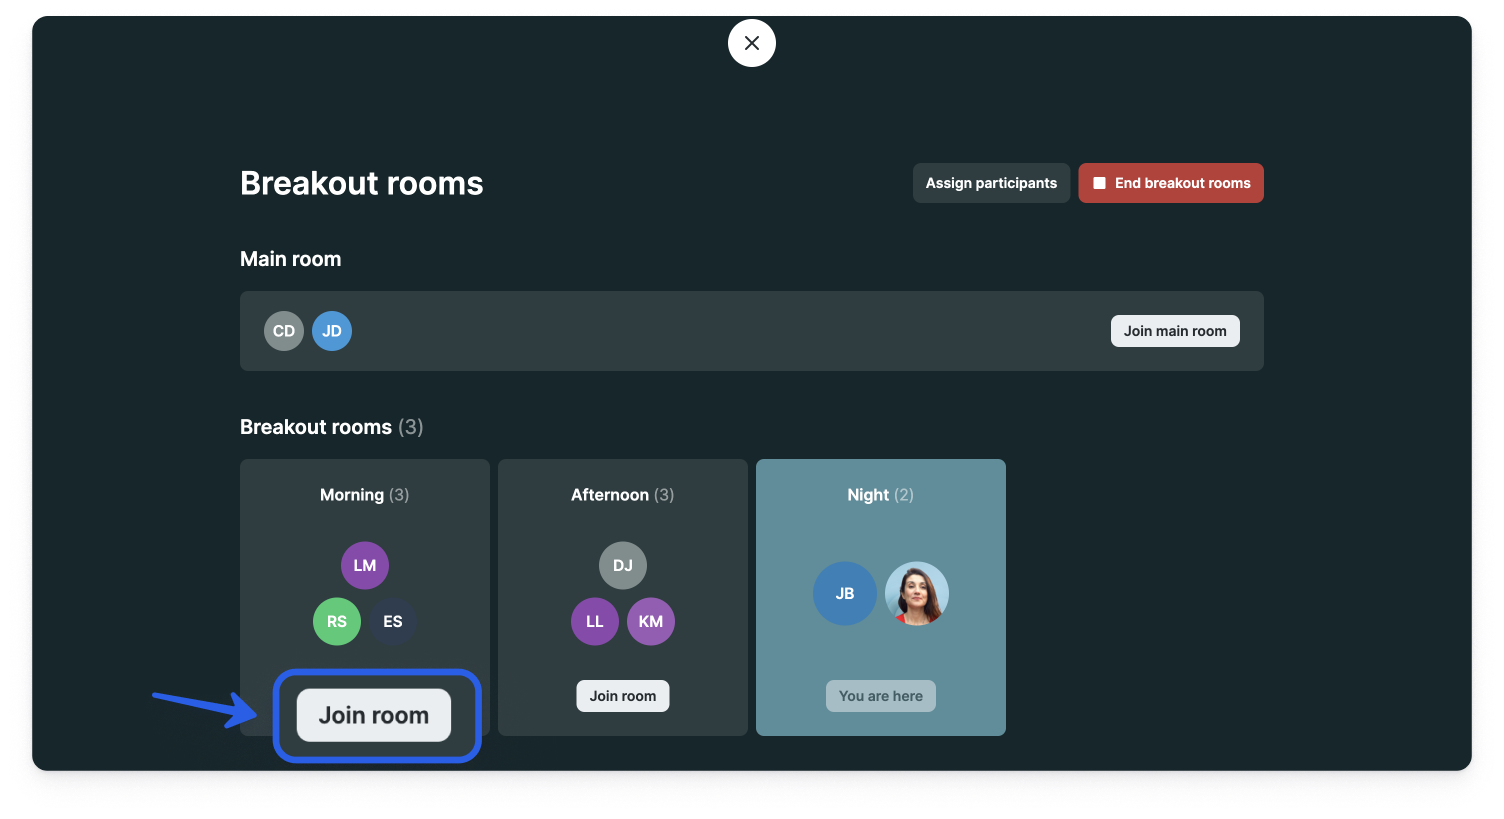
- 3
- That's it, you're now in the new breakout room! 🎉
-

End Your Breakout Rooms
To end the breakout rooms, you need to go back to the breakout room hub.
- 1
- Click on the name of your room at the top of the room.
-
- 2
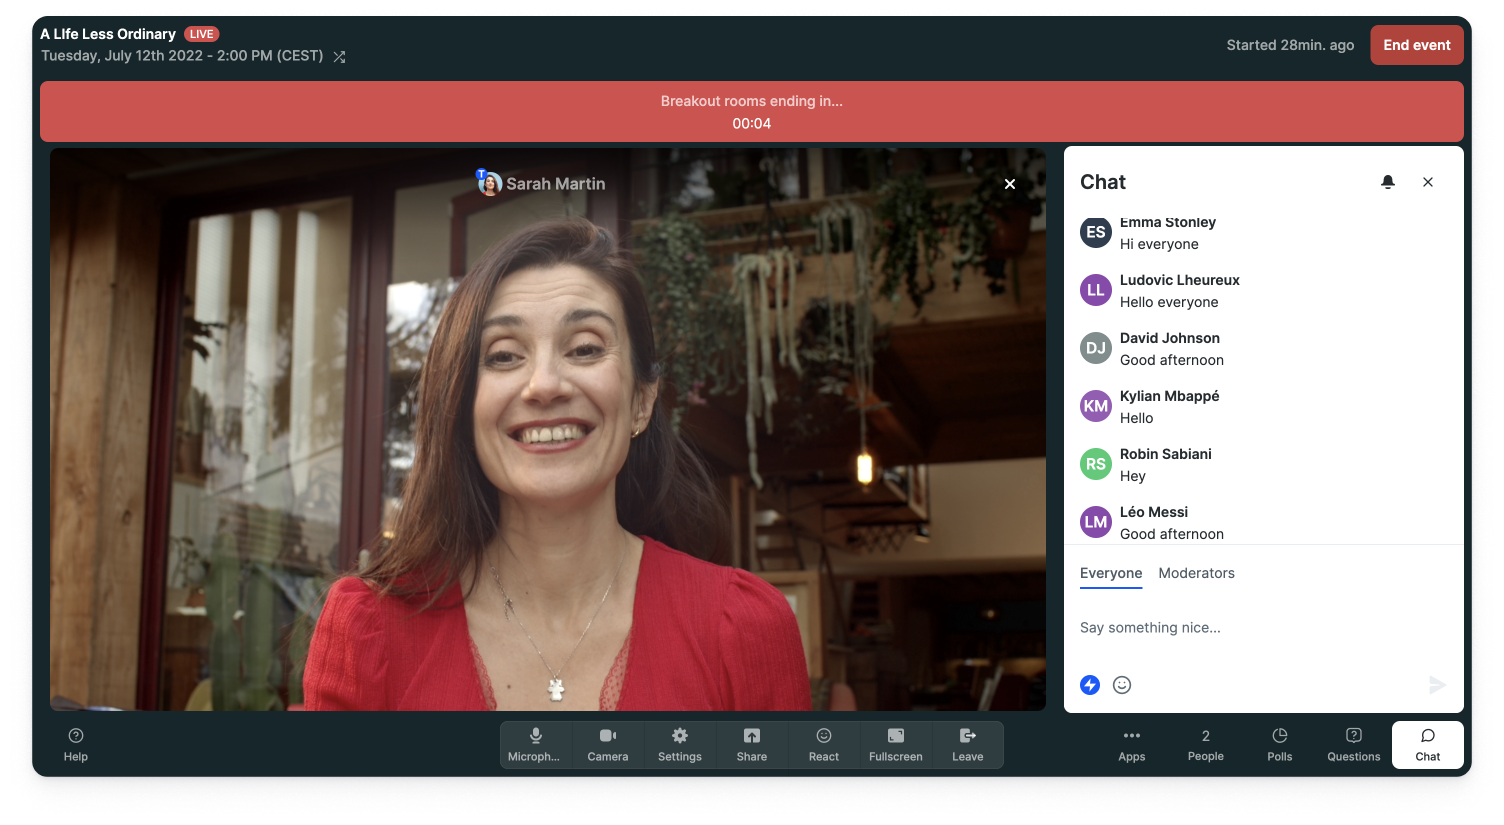
- Click on End breakout rooms.
-

- 3
- Confirm that you definitely want to End the breakout rooms.
-

- 4
- There will be a 10-second countdown before your attendees are redirected to the main room.
-
- 5
- You can verify that the breakout rooms have ended as there isn't any room name at the middle top of the room as there was during the breakout room session.
-
Now that you know everything about the breakout rooms, enjoy the feature! 😉